Project 1: Continuing with the Report Again
- Last time we built an outline for a proposal report.
- We are working with the 2019 Chicago Movies in the Park Dataset.
- The data is from here
- A supporting page is here
- Looking over the paper requirements, we need a cover page
- This is an easy step.
- On the Insert tab, in the pages command group, select Cover Page.
- Select an appropriate cover page.
- Please don't allow fill in spaces to be blank.
- Fill them in.
- Or delete them.
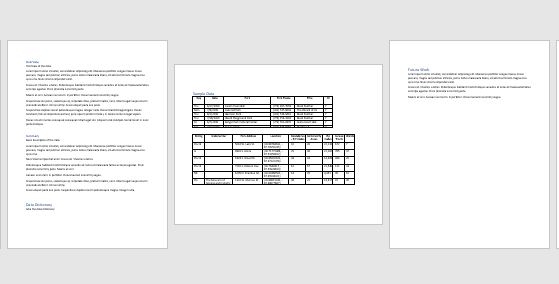
- The document also requests a sample of the data.
- If you don't already have it open, open the csv file in excel.
- We might want to make the columns a bit wider so that we can view all data.
- We might want to format the header line
- On the Home tab in the Alignment command group select Wrap Text
- Adjust the columns so everything fits.
- Make the text Bold, and center it both ways in the cell.
-

- You might want to save this document for later.
- You will nee to use save as
- Change the type to be Excel Workbook
- If you attempt to save the document without changing format from csv, you will lose most changes.
- Save the docuemnt somewhere you can find it.
- Highlight the heading and four or five complete rows and copy
- Move to the Sample Data portion of the document
- Notice we have various choices for pasting.
- Comment on linking.
- For now, chose destination style.
- Notice it doesn't fit very well
Change the page orientation.
- On the Layout tab in the Page Setup command group, change the orientation to be Landscape
- Darn, that changes it for the entire document.
- What we need to do is divide the document so we can format only a portion of it.
- This is done with section breaks.
- Information on this starts on page 228 of the book.
- Section breaks divide the document into physical pieces.
- They are used to change formatting between these pieces.
- Page orientation
- Page numbers
- Think chapters in a book.
- Page Breaks do not accomplish this task.
- To do this.
- Turn on the Hide/Show button (Home tab, paragraph)
- Move to the Data Dictionary heading.
- Move the cursor to after the last item in this area.
- On the Layout tab select Breaks in the Page Setup command group.
- Insert a Next Page break.
- Double clicking in the header section will tell you what section you are in.
- Add another section break after the table.
-

- The table is still too large, so let's break it into two pieces.
- I took everything up to the CC field for the first table.
- I took everything else for the second table.
- Adjust the column widths by dragging.
- Right align all numeric columns
- Center the CC column
-

- There are many tools for dealing with tables in word.
- This starts on 209 in the book.
- I will be minimalistic here.
- But please do apply a nice table style
- On the Design subtab of the Table Tools special tab, select a style from the Table Styles
- Notice the adjustments on the left.
-

- Multiple Columns
- While not required here, another application of sections is to allow multiple column format in your document.
Move to the Introduction portion of the document.
- Highlight all of the text in this section (but not the heading)
- On the Layout tab in the Page Setup command group, select Two Columns
- Turn on Hide/Show.
- Notice that word has inserted Continuous Section Breaks before and after the multi column text.
- Column breaks can be used to adjust where the columns break.
- These are not section breaks, but "page breaks".


