Page Numbering and a Few Other Skills.
- Our goal in this section is to learn about page numbering.
- This can be complex.
- And requires attention to detail.
- Start by downloading this document
- This is a wikipedia article.
- We are formatting it, but it might be useful to read as well.
- The title is not in the proper format.
- You could just change the C to upper case.
- Or you could
- Select the title.
- On the Home tab, Font Workgroup use the Change Case menu to adjust the case
-

- I don't like this extremely well, but it is there.
- Also note, the clear format button beside it.
- Remember, as you use these tools, "Look around"
- However, noting that there was an error in the title, there might be errors in the headings.
- In word you can search by formatting as well as by value.
- Go to the Home Tab, Editing Group and drop down the Find menu.
- Select Advanced Find
-

- This will bring up the Find and Replace dialog box.
-
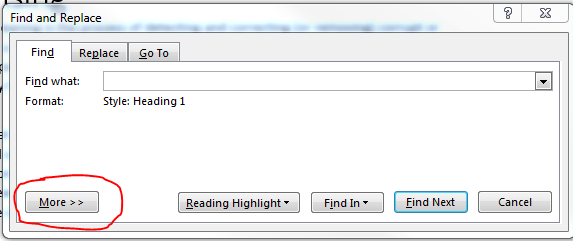
- Select More
-
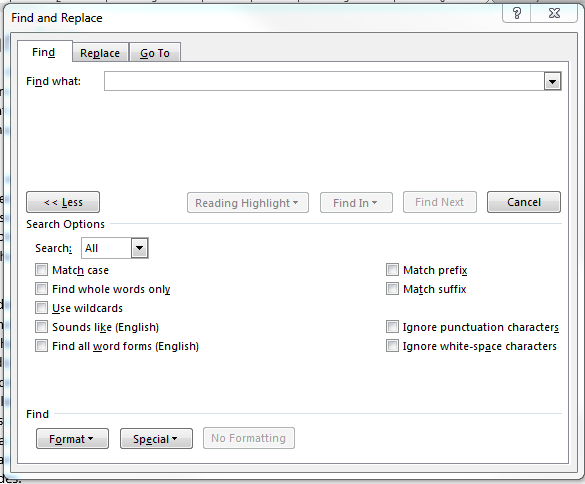
- Select the Format menu, then select style
-
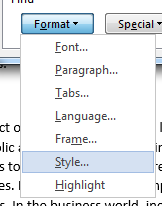
- We are looking for Heading 1 styles, so select that and search.
- Notice that a number of Heading 1 values are not correct. Fix them.
- In the article, the Data Quality section is essentially a nested list.
-
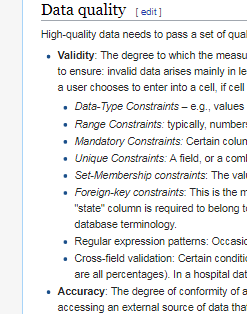
- Go to the Data Quality section
- You might want to use a tool to do this,
- Home, Editing, Advanced Find, Go To
- To make the next task easier
- Go to the View tab
- Select Multiple Pages on the Zoom workgroup
-

- Zoom in until you can see both pages.
-
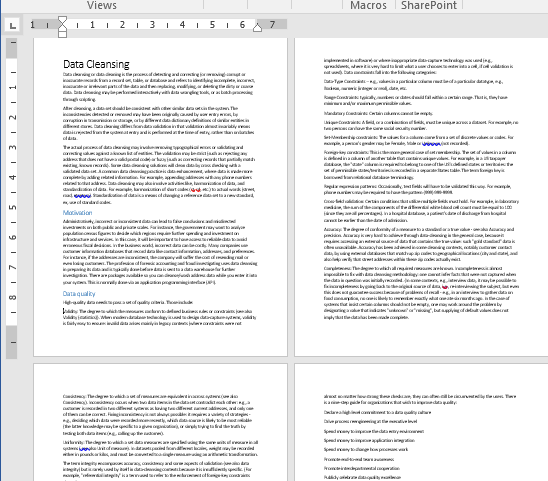
- Highlight from Validity through Uniformity
- This will be across three pages
-
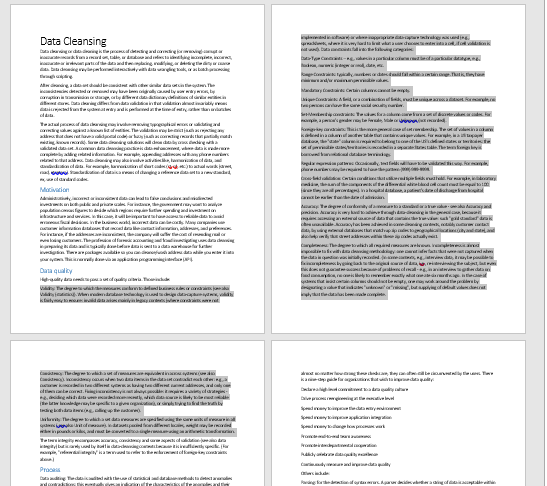
- On the Home tab, in the Paragraph workgroup select Bullets
- Notice you have multiple choices for bullet types
- Including defining your own.
-
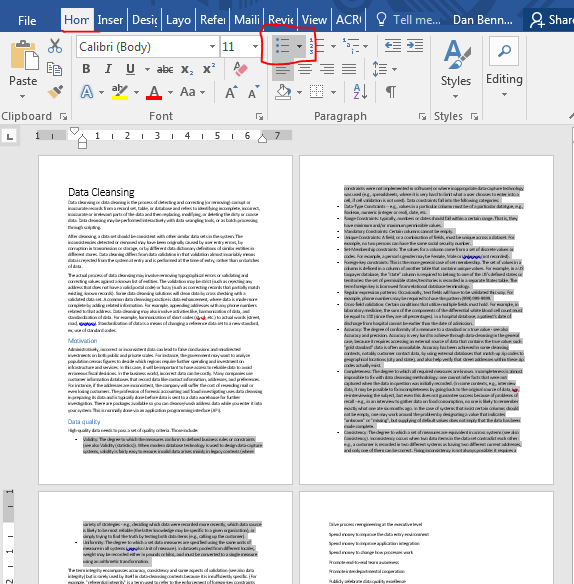
- The points Data-Type through Cross-field validation are all a sublist under Validity.
- Select these points (They are all on the same page)
- Press tab.
- Press tab and shift tab several times to see what happens.
- While you are here, look at Numbering and Multilevel Lists.
Add front and end material.
- Note It is important that you use section breaks, not just page breaks for the next steps.
- Insert a cover page of your choice.
- Using the Hide/Show button on the home tab notice
- Word did not create a new section for the cover page.
- This will be a problem when we go to add page numbers
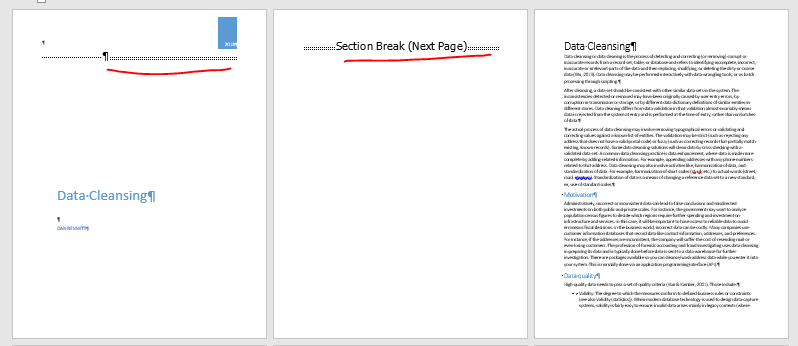
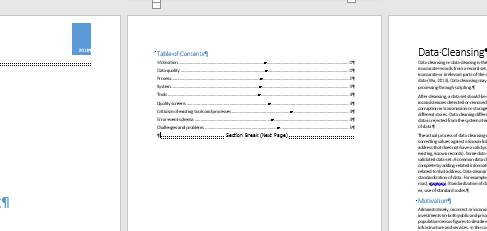
- So add a section break between the title page and the text.
- You will need to do this twice.
- In the end, you want a Title Page, a blank Page, the text.
-
- In the new section, build a Table of Contents.
-
- Move to the end of the document.
- Insert a Next Page section break at the end for the bib.
- Insert a bib on this page.
- Note It is important that you use section breaks, not just page breaks.
Numbering pages
- We want the following
- The front material numbered with roman numerals (i,ii, iii...) on the bottom center of the page for all pages from the TOC on
- The normal text numbered with Arabic numerals (1,2, ...) on the top right hand corner of all pages except for the first page.
- No page numbers to appear in the end material.
- The next steps require some care to achieve correctly.
- Do this only after the majority of the document is finished.
- Starting at the beginning of the paper working to the end by section
- Fix the Header/Footer format
- Remove Link to Previous in sections where the page formatting changes.
- You must do this in both the header and footer.
- Set the page numbering.
- Start at the beginning of the document.
- Go to the Table of contents.
- Enter Header/Footer mode
- Two choices for this
- Double click in a header or footer area
- Insert tab, Header & Footer workgroup, select Header or footer.
- Notice
- You are in the Header & Footer Tools tab
- Notice the information available identifying location
-
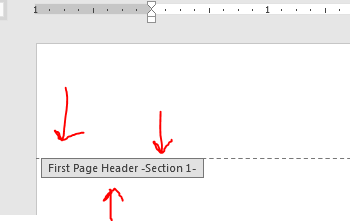
- Notice how this changes as you move through the document.
- Notice the Link to Previous toggle in the Tab and the Same as Previous alert in the heading/footer.
-
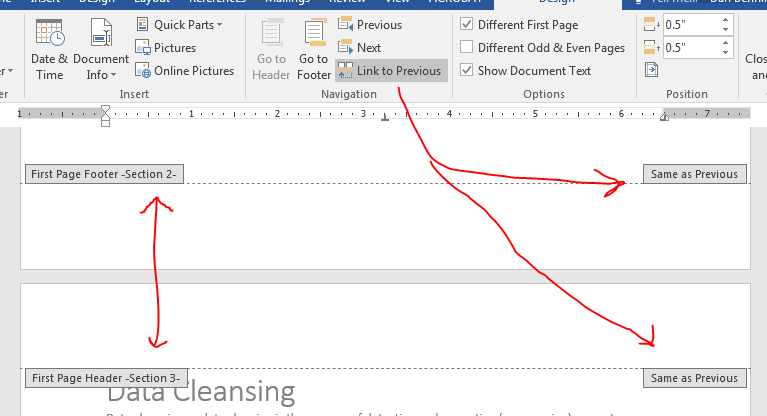
- The Link to Previous button
- Is wonderful if we wish to keep the formatting from the previous section (Like the landscape/portrait change in the last document)
- But is a challenge when we do not.
- Some real formatting.
- Notice in the Design tab there are multiple options
-
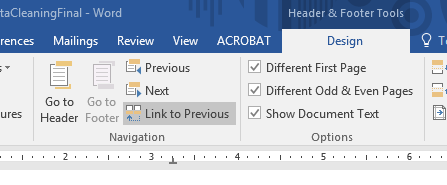
- These will change depending on conditions.
- Different First Page means the first page of the section will be different from all other pages.
- Look at the book at beginning of a chapter.
- This assumes that each chapter begins with a section break.
- Different Odd & Even Pages
- This formats the page differently on even and odd pages.
- Normally used with an even or odd page section break.
- Again, notice in the book, Chapter 17 and 18.
- Notice the page numbers different (always on the outside edge)
- Go to the TOC page.
- We want to put a page number at the bottom of this page.
- But we do not want the page number to show up on the cover page.
- And we don't want different page numbering across the toc.
- To accomplish this
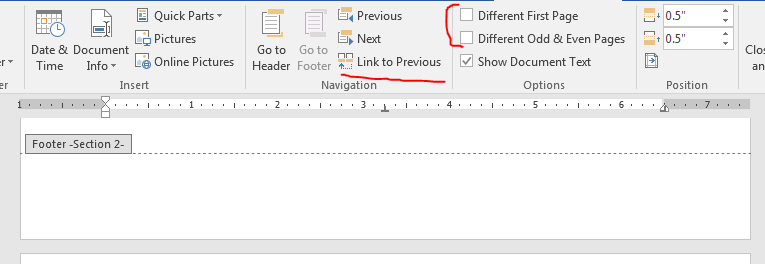
- Click in the footer.
- Remove Link To Previous
- Uncheck Different First Page
- Caution, this may
- Move you on the screen, make sure you stay in the Section 2 Footer
- Re-click Link To Previous
- Just be patient, until you can get it to match the screen shot.
- You can now apply a page number to footer
- Move to the center of the bottom
- On the Design tab, in the Header & Footer workgroup select Page Number
- I just selected Current Position
- Note the page number is a 0

- Scroll up, there should be no page numbers on the cover page.
- Scroll down, there will be page numbers in the rest of the document.
- Fixing the number and style
- Again select Page Number but this time select Format Page Numbers
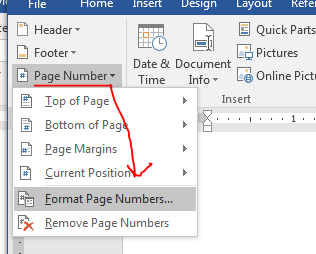
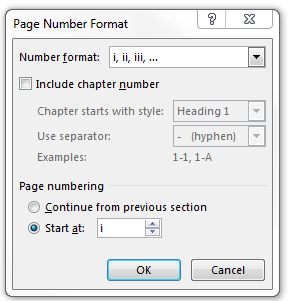
- Roman numerals do not like 0, so first change the start at to be 1.
- Then change the Number Format to be i, ii, iii
- Let's check to see if it worked.
- After the TOC
- Insert a Page Break, not a Next Page Section Break
- Insert a bunch of text with =lorem(20,
- One last piece
- Go to the first page of section 3, footer
- Turn off any different boxes.
- Remove Link to previous
- Delete the page number.
- All the page numbers in the rest of the document should go away.
- Two more steps
- Go to header in the first page of section 3.
- Mark different first page, but don't mark Different Even/Odd
- Make sure Link to Previous is deactivated.
- Put no page numbers here
- Go to the second page header of section 3
- Inset a page number in the Upper Right hand corner.
- Change the page numbers to start at 1.
- Fix the End Material page numbering
- Go The header of section 4
- Uncheck Different First Page
- Turn off Link To Previous.
- Insert a page break to make sure no page numbers show up.
- Double check the document to make sure that it is set the way you want it.
- Smile


