User Interface
- User interfaces are usually constructed from items known as widgets
- A widget is a generic term for an item from which a UI is constructed.
- A widget is (usually) an item which appears on the screen.
- Widgets are normally derived as a hierarchy, with a base class and multiple derived classes.
- Widgets create/respond to events, and often have registered callbacks to handle the action.
- The simplest widgets are
- A label widget, which can hold text or graphics
- A button widget which can be pushed.
- Most GUI widget sets have multiple types of buttons.
- Some are just like a doorbell or key, register push and release events.
- Some are like light switches, on or off, register change of events callbacks.
- Some are select one of many ....
- Usually there are special purpose widgets to show progress like progress bars
- There are usually input widgets to allow for text input.
- There are also container widgets
- These contain other widgets.
- A horizontal box aligns the contained widgets in a row
- A vertical box aligns the contained widgets in a column.
- Sometimes there are 2d layout widgets.
- There are usually special purpose widgets as well.
- You can almost always extend a widget class to form a new widget.
- Here is a reference to the Unreal widget set.
- Unreal Motion Graphics UI Designer (UMG)
- There is a user-interface class
- In the tutorial we will make three of these
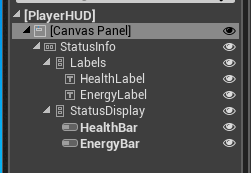
- One for the player's HUD (health, energy, ammo)
- One for the start menu
- One for the pause menu.
- The tutorial creates a starting level, which has the responsibility for holding the main menu.
- The tutorial adds a number of variables to the character
- Current and max ammo (ints)
- Health (float)
- Energy (float)
- You add several scripts to the character
- One to create the HUD
- Note this extends a blue print already present.
-

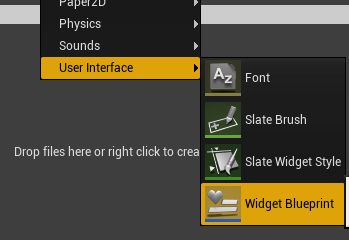
- First create the HUD widget, you select one of the UI blueprints constructed above.
- Next save a reference to this, (promote it to a variable).
- This saves a reference to the item so it can be accessed later.
-

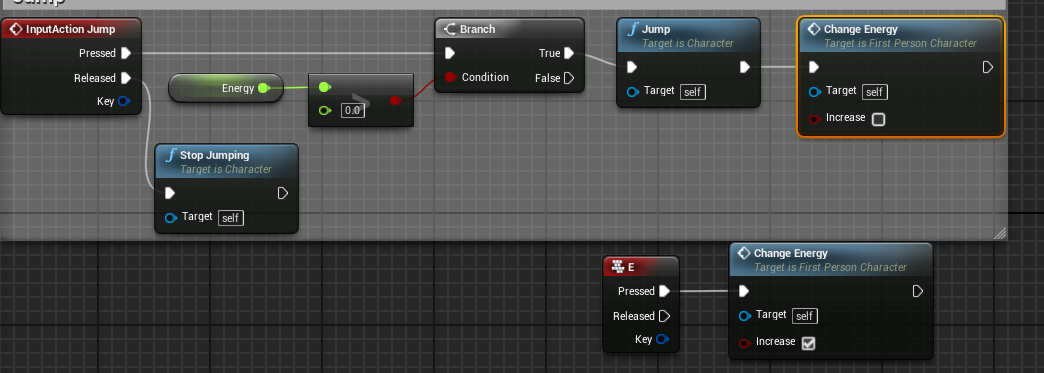
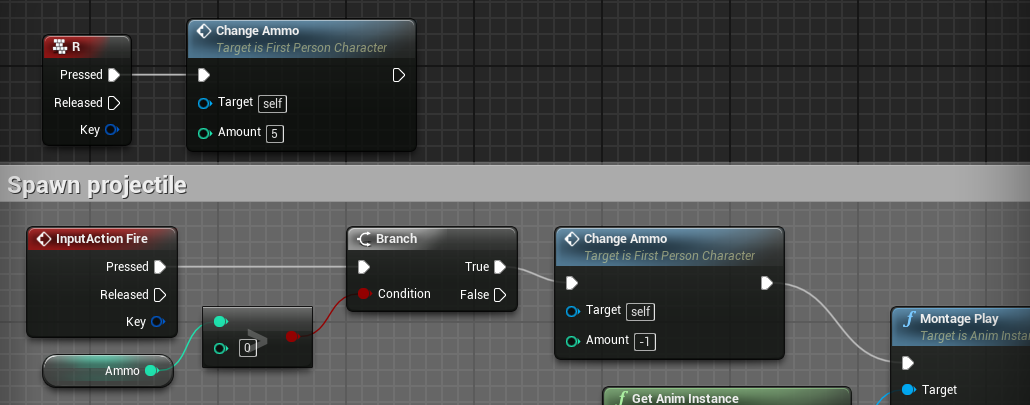
- Second, change the energy
- I created a ChangeEnergy function, just to clean things up.
-
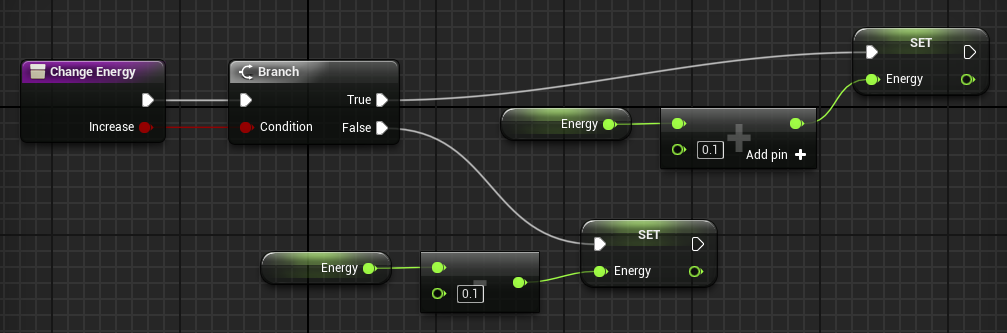
- And I called it
-
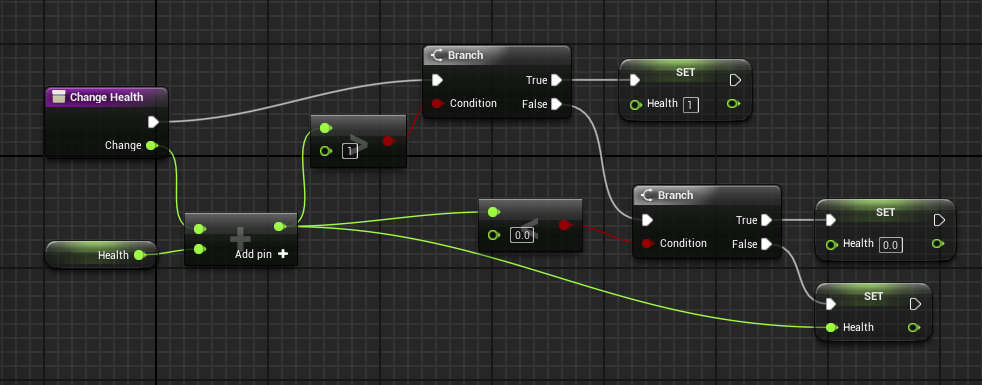
- The health:
- I created a change health function as well.
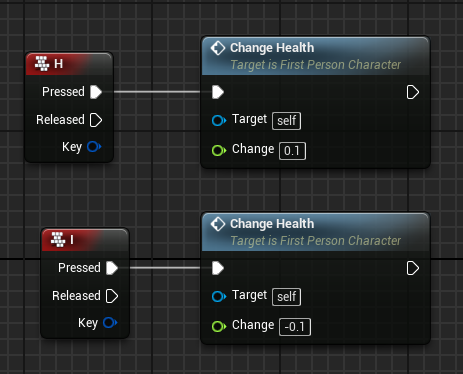
-
- And I called it (H for heal, I for Injure)
-
- And the ammo:
- And a function to change this (int parameter)
-
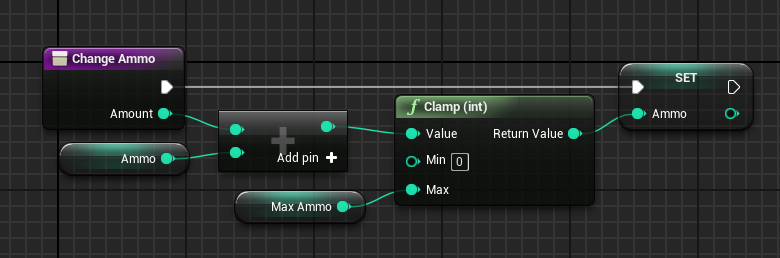
- Note the clamp function.
- And called it when a shot was fired. Or the reload key was pressed.
-
- Next you build the HUD
- The EDITOR is different.
- The main window shows the "screen" inside the white box.
- There is a "palette" of widgets in the upper left.
- There is a list of widgets in your interface center left.
- A configuration area on the right.
- Drag widgets from the palette to the list, nesting appropriately.
- Configure on the right.
- Graphical moves in the center.
- Under the canvas you place a Horizontal box.
- This will hold the health and energy information
- Inside this you place two vertical boxes
- These will hold the labels and progress bars indicating the levels of these two variables.
- Note, use the Text widget, which is a label, not the Text Box which is for input
-
- They show you how to set colors, and layout.
-

- I found this to be a "fiddly" interface.
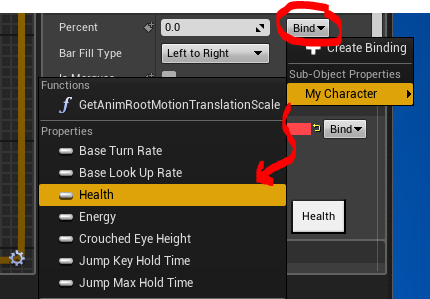
- In the constructor for the HUD, you get an instance to the player character and save it in a local variable.
-
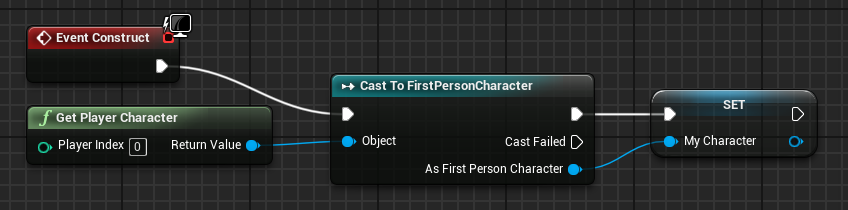
- From here on, a reference to MyCharacter access the instance of the player character.
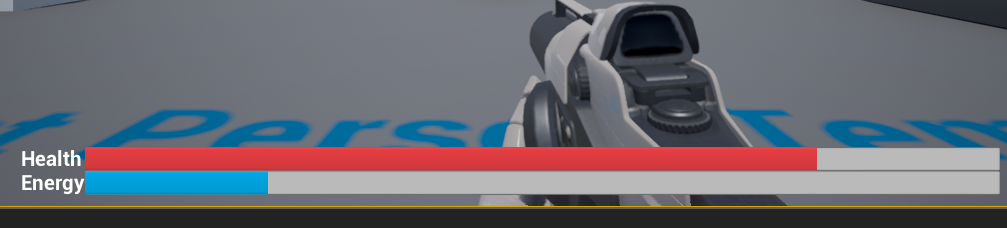
- Then you bind the progress bars to the variables via a script.
- And the result is
-
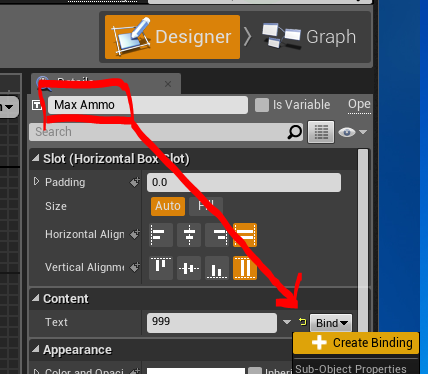
- You add a second horizontal box for ammo
- This contains an image and three text boxes.
- I changed the first box to be an image.
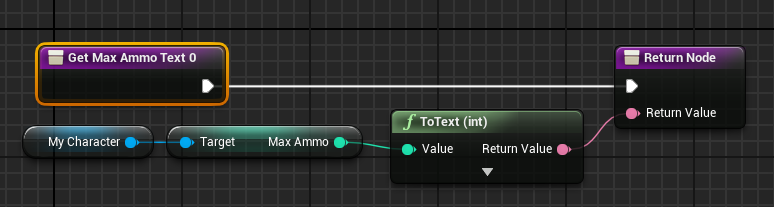
- Then we need to write a script that updates the text.
-
-
- This gives us
-