Introduction to One Note, Setup
The Objectives of this section are
- Be able to create and relocate OneNote notebooks.
- Understand how OneNote notebooks are organized.
- Create, destroy, label and move different organizational units within OneNote
Introduction to One Note, Setup
- OneNote is part of Microsoft Office
- It is an attempt to create an electronic notebook.
- I think, with the advent to tablets, it might become an important addition to the student's tool box.
- It allows
- Free-form information gathering and storage
- Text, pictures, links, movies, ....
- Hand annotation
- Tags and Searching
- Multiuser collaboration
- It works on many platforms
- And a web based version is available too
- It is integrated into OneDrive
- References are Part VII of your book, Chapters 30, 31 and 32.
- Let's Get started,
- But first.
- OneNote is a bit strange with saving.
- When you start it, I will ask for OneDrive access.
- If you do not provide this, it will attempt to save it in your home directory.
- This is probably a bad thing on the lab machines.
- But I don't think we have a choice as we start up.
- So Start OneNote2013
- Click on the Windows Start Button
-

- Either
- select All Programs
-
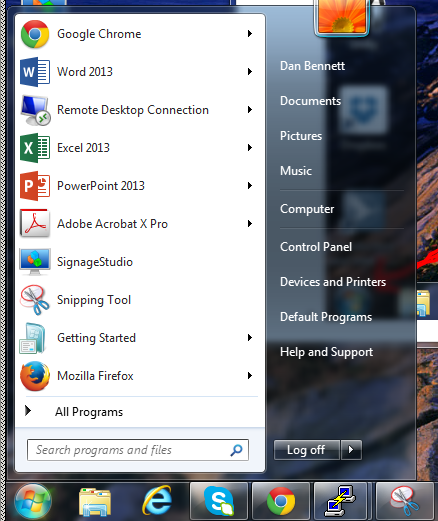
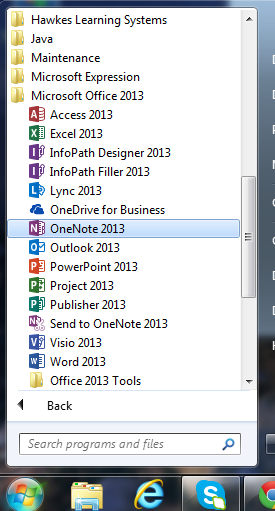
- And browse to Microsoft Office 2013 followed by OneNote 2013
-
- OR
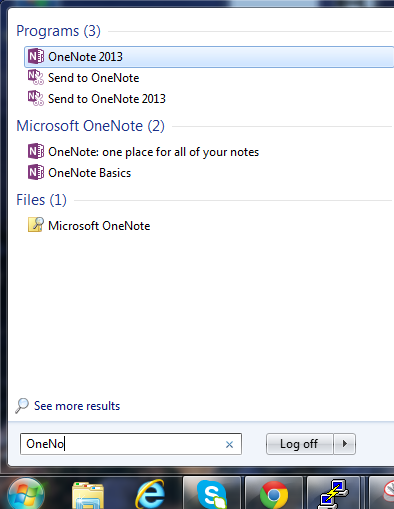
- Type enough of OneNote 2013 in the search bar to find the program.
-
- When you start OneNote it will create a default notebook.
- This will have some tutorial information, and we will get back to this later.
- But for now, let's move it to the S drive.
- Select File from the tab.
- Select Settings → Move or Share
- Select Move Notebook
- Select Move into a different folder
- Browse to that folder.
- Select Move.
- Let us create a new notebook, for a party.
- File
- New
- Name the Notebook
-
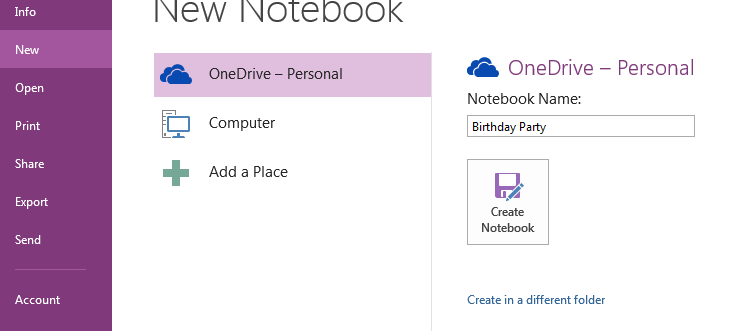
- Select Create in a different folder and select where to save it.
- Notebooks consist of multiple organizational levels
- Page 867
- The Notebook
- Section Groups
- Sections
- Pages
- Subpages
- Let's Start with a plan
- Draw it out on paper is easier for me
-

- The party will be a notebook.
- The Guests will be a section.
- I will combine the food and drink sections into an eats section group.
- I will do the same with outdoor, indoor and other activities into a section group labeled fun
- So let's do this:
- From Working With Sections Page 879
- And Creating A section Group Page 883
- This is a blank notebook.
-
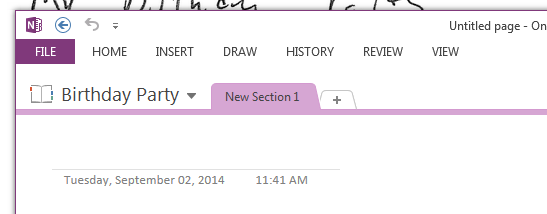
- Double Click in the New Section 1 tab and rename it to Guests
- Click the + to make a new section.
- Label this Food
- Right click beside the sections and select New Section Group
-

-
- Click on New Section Group 1 and rename it to be Eats
-

- You can enter a section group by clicking on it.
- You can exit a section group by clicking the return arrow.
-
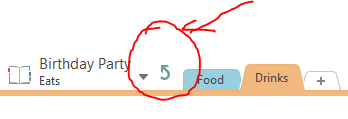
- You can create a new section for drinks, either at the top level and drag it into eats, or create it inside the eats section group.
- Do the same for the section group Fun with the pages Outdoor Games, Indoor Games and Other
- This is by no means a final setup, you can drag and drop and move sections anywhere.
- Pages
- From Working with Pages
- There is a default page in each section, but it is untitled
- Click above the date, and enter a title
- Or Right click on untitled and select rename.
-

- Name the first page Guest List
-

- You can click on Add Page to add a new page.
- You can delete anything by right clicking and select Delete
- Add two more pages, Invitations and RSVPs
- Click to move between pages.
- There are a number of predefined page templates
- Click on the INSERT tab.
- Select Page Templates on the far right hand side

- Select a format from the short list or
- Select Page Templates
- This will open up a Templates menu on the right.
- You can select from a wider range of templates.
- Save your current page as a template
- Import other templates
- SubPages
- From Creating Subpages page 885
- Once you have a page, you can add subpages.
- This is the lowest organizational unit in OneNote.
- Simply Create a page.
- Right click on this page page title.
- Select Make Subpage selection
-
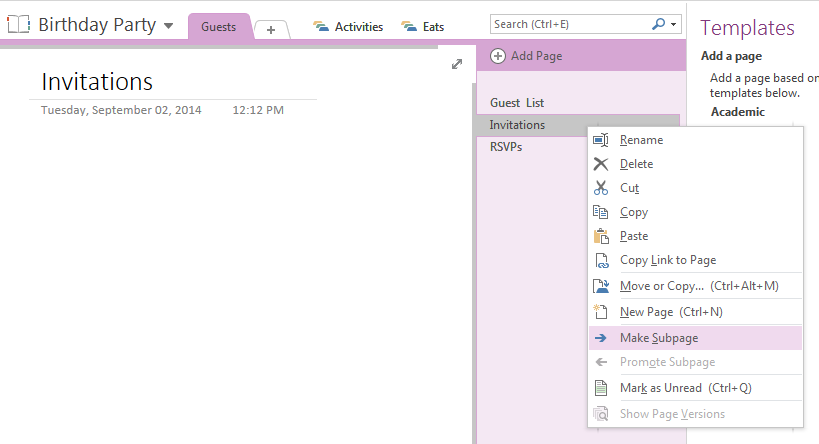
- The name will now be indented to show that this page is a subpage
- You can promote subpages to pages in the same manner.


